How to Vent a Dryer Out a Window
Why Vent Out A Window?
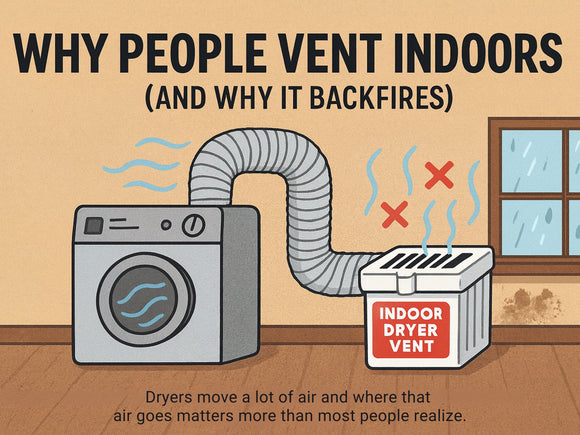
While many homes have a clothes dryer vent outlet that runs through a wall or roof, there are also housing situations that don't allow the luxury of this type of ventilation. In these cases alternative arrangements must be made for the venting of exhaust gases that your dryer emits. The most popular solution is to vent your dryer through a nearby window. This option can be a lifesaver for people who have no other reasonable option and still wish to enjoy the benefits of having a clothes dryer right in their home. Before making the decision to vent through a window, there are questions to consider.
What are some of the tools and building supplies needed to perform the job? What is the actual procedure for running the vent through the window? And, are there any easier ways to solve this problem? Lets answer these questions.
Tools And Supplies
Running a dryer duct through a window is not the easiest task to perform, the job requires not only some knowledge of construction methods and techniques, but also the proper tools and supplies. Some supplies may be substituted for others.
Tools:
1. Tape Measure
2. T-Square or Straightedge
3. Pencil or Marker
4. Jigsaw or Table Saw
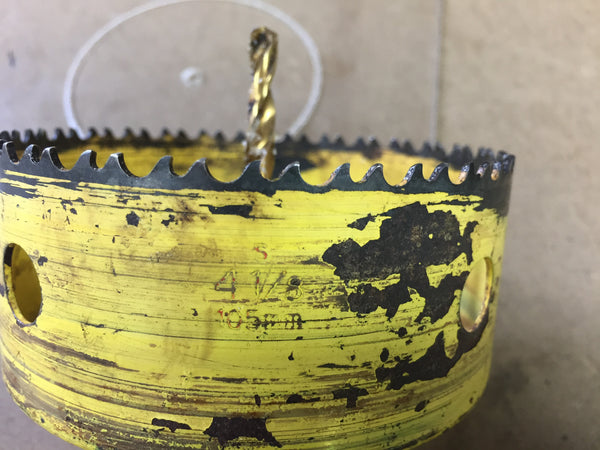
5. 4-1/8" Inch Hole Saw
6. Drill
7. Caulk Gun
8. Masking Tape or Other Tape
Supplies:
1. 1/4" Inch Acrylic Sheet or Any Translucent Material
2. 100% Silicone (Caulking or Aquarium Sealant)
3. Dryer Vent
4. Aluminum Tape or 2x Hose Clamps
How To Vent Your Dryer Out A Window
Once the necessary supplies have been acquired, the first step is to measure the height and width of the window. After this is done, lay the acrylic sheet on a flat surface and draw out the exact measurements of the window onto the sheet.
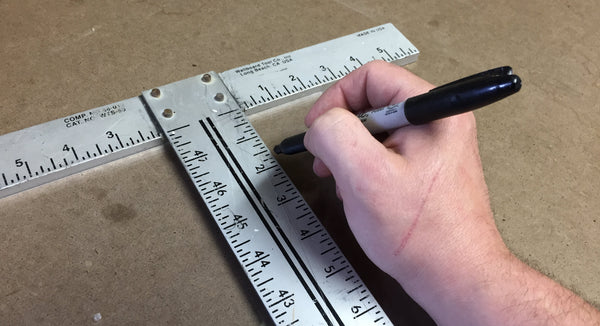
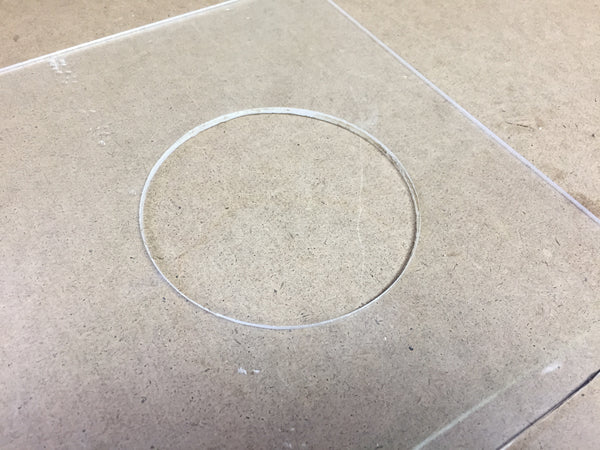
Use the jigsaw to cut along the lines that you have made. Take your time while cutting to make sure that the acrylic sheet is not being damaged.
Place the 4-1/8 inch hole saw in the jaws of the drill. Drill a hole through the piece of acrylic, making certain that the hole is at least a half an inch from any edge of the sheet. It is helpful to place a piece of scrap wood behind the acrylic sheet, this will keep the hole saw from wobbling while drilling.
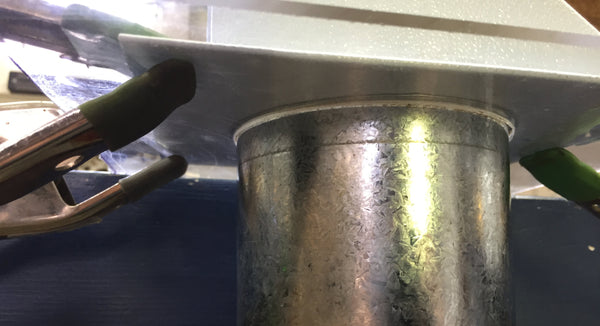
Squeeze a 3/16 inch bead of caulk on the the rear side of a dryer vent hood. Place the vent hood pipe through the hole, with the vent portion on what will be the outside surface of the acrylic. In other words, make sure the vent will be on the outside of the window.
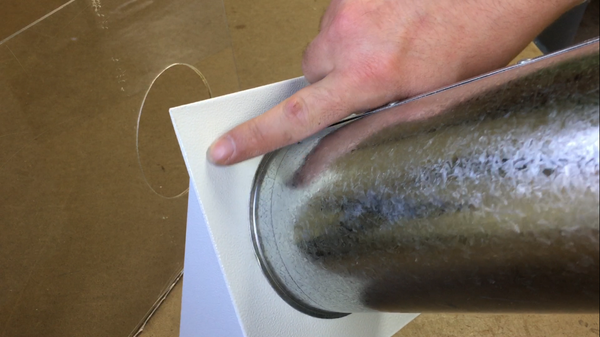
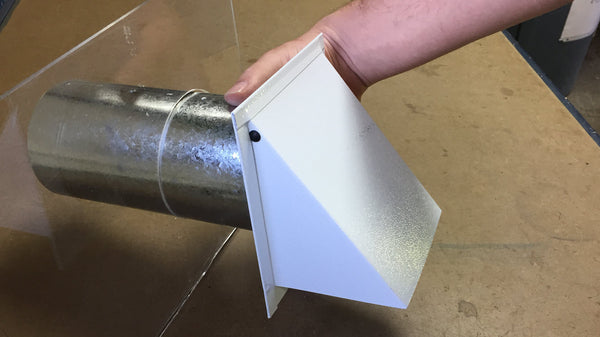
Push the vent into place, making sure it creates a good seal. Now secure the vent hood to the acrylic sheet with clamps until it cures (usually 12 to 24 hrs). If your vent comes with pre-drilled holes on the flange you may want to secure the vent with screws in addiction to the sealant. You can use 4 Philips head screws but be sure to pre-drill the acrylic sheet at the screw locations to prevent cracking.
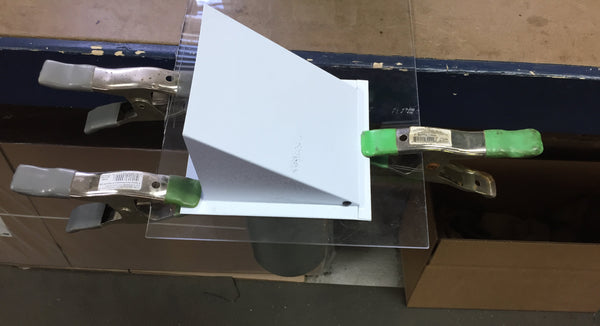
Now remove the window from the frame, and apply a thin bead of caulk to the inner rim of the window frame. Once this is done, press the acrylic sheet into this space, making sure that the vent hood ends up on the outside of the window, (This may seem silly to mention, however I have made this mistake. Although we had a good laugh at my expense, it did cost me time to clean the area and re-apply the caulk.). Use the masking tape to secure the acrylic sheet to the window frame. Depending on your window frame you could secure the acrylic to the frame with screws or bolts. Again, be sure to pre-drill the acrylic sheet at the screw locations to prevent cracking. Allow the caulk to cure for at least twenty four hours.
Once the caulking is dry, and assuming you are using flex duct, slide the hose clamps over the duct you have chosen to run between the dryer and the window. The duct can be of the flexible or the rigged variety. Place one end of the duct over the pipe on the back of the dryer, and the other end over the pipe on the back of the vent hood. After this step is completed, use hose clamps to secure the ducts. Note: Aluminum tape is used to secure rigged duct mostly but can be used for flex as well although when removing flex for cleaning may tear flex duct. If hose clamps are used they should be tightened enough to produce a good seal, but not so tight that you damage the duct or the ends of the vent pipes.
Your dryer should now be properly vented to the outside.
Obviously, this is a somewhat complex project which does require some amount of construction know-how. This solution may not be for everyone, if your looking for an easier way to vent your dryer out a window, there is a simple and easy solution.
Are There Easier Ways To Vent Out A Window?
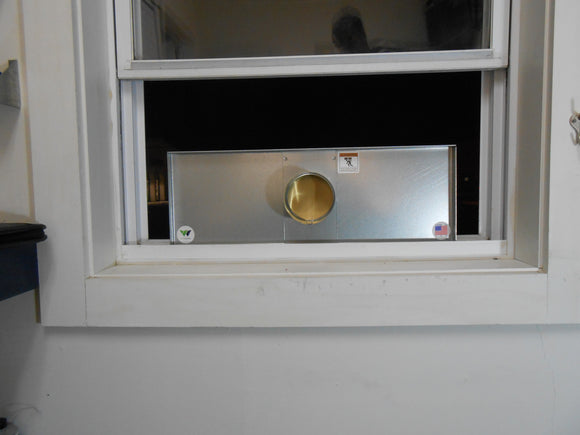
Luckily, for those of us who do not have the time, tools, or expertise to do such a job, there is an extremely easy to install and affordable window vent that will have you up and running in a few minutes.
This product is called the Window Dryer Vent, and it is as easy to install as a window fan. To install, you simply open the window you wish to vent out of, place the hood vent in the open window, adjust the sliding side panels to fit the window, and close the window. This procedure can literally take less than 3 minutes, which means that in 3 minutes you can go from having a dryer that cannot be used to having a fully functional and vented dryer.
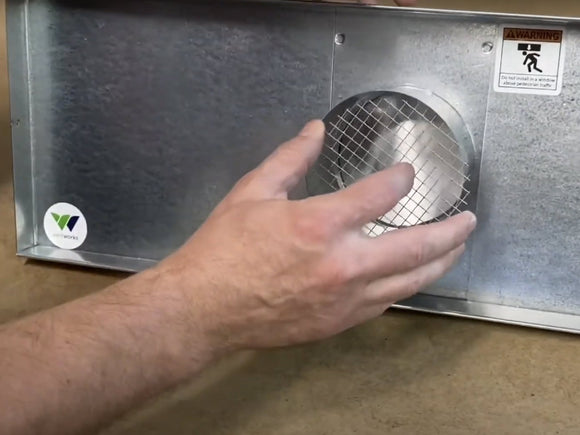
This innovative product is constructed from 24 gauge galvanized steel, has a back-draft damper made from aluminum to prevent outdoor drafts from making their way inside, and has an enlarged exterior hood to make sure that air flows easily.
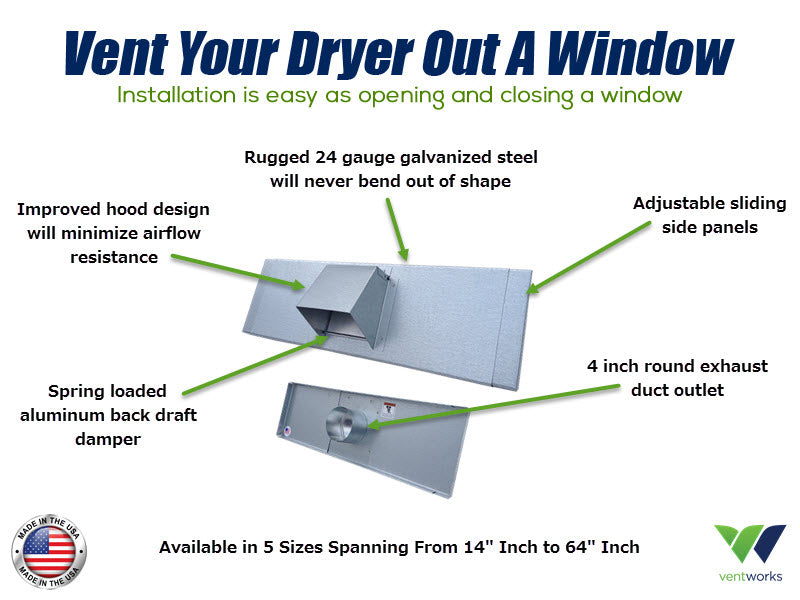
In addition, this window dryer vent is made in America, and at a cost of under $60. This vent will not only save you hours of work, it will save you money. Purchase this unique product, you will not regret it!
Want to learn more? More information can be found here: Window Dryer Vent
Also if you enjoyed this article; let your friends know by using the buttons below.
Thanks in advance, we truly appreciate it.